Bike Guardian
Bike Theft
Smart Lock
Technologies
How It Works
Difficulties
Next Steps
UCSD IEEE · Spring 2026
Samuel Park
Hannah Fletcher
The Problem
Picture this: you wake up, head outside, and your bike or scooter is gone. No warning, no trace, nothing. At UCSD, this is not hypothetical. Bike theft notifications hit campus iMessage at least once every week, and it hits close to home. My own roommate had his scooter stolen this past winter quarter, with a lock on it.
The problem is not that students are careless. It is that the tools they have are passive and outdated. A standard lock cannot alert you, cannot notify you, and by the time you find out your bike is gone, it already is. On a campus this large, a bike is not a luxury. It is how you get to class on time. Losing it means losing your day. This is exactly the kind of problem that the Spring 2026 Quarterly Projects theme of safety and security was made for, and this is the problem we set out to solve.
Our Solution
The Smart Bike Lock solves what traditional locks cannot. Access is controlled through an RFID sensor that responds only to one authorized card. No keys, nothing to pick. The moment someone tampers with it, the alarm triggers and an alert goes straight to your phone in real time. Whether you are in lecture or across campus, you always know. You always have a chance to respond.
This is not just a lock. It is a security system built for students.
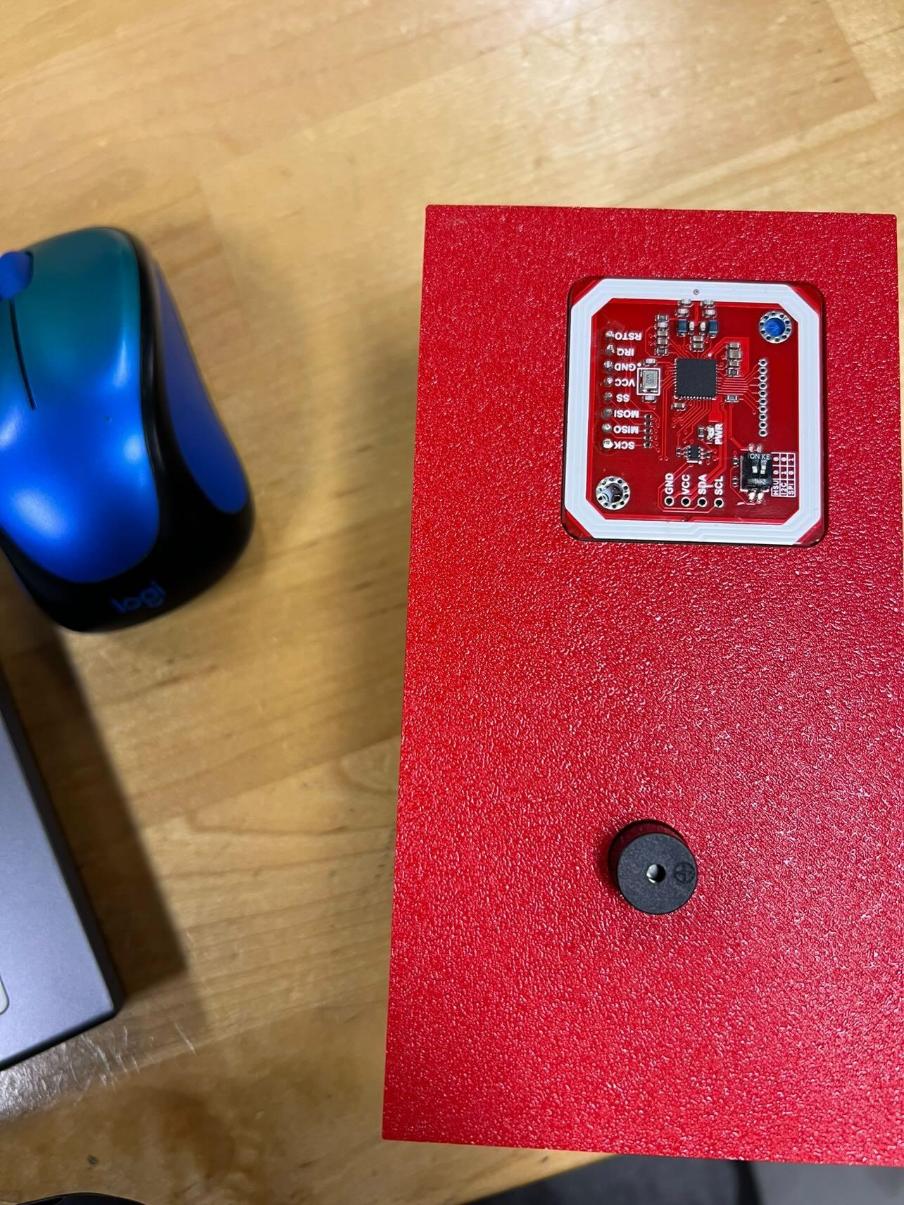
Stack and Materials
For the software side, we designed the enclosure using Onshape for CAD and wrote all of our code in C++ through the Arduino IDE.
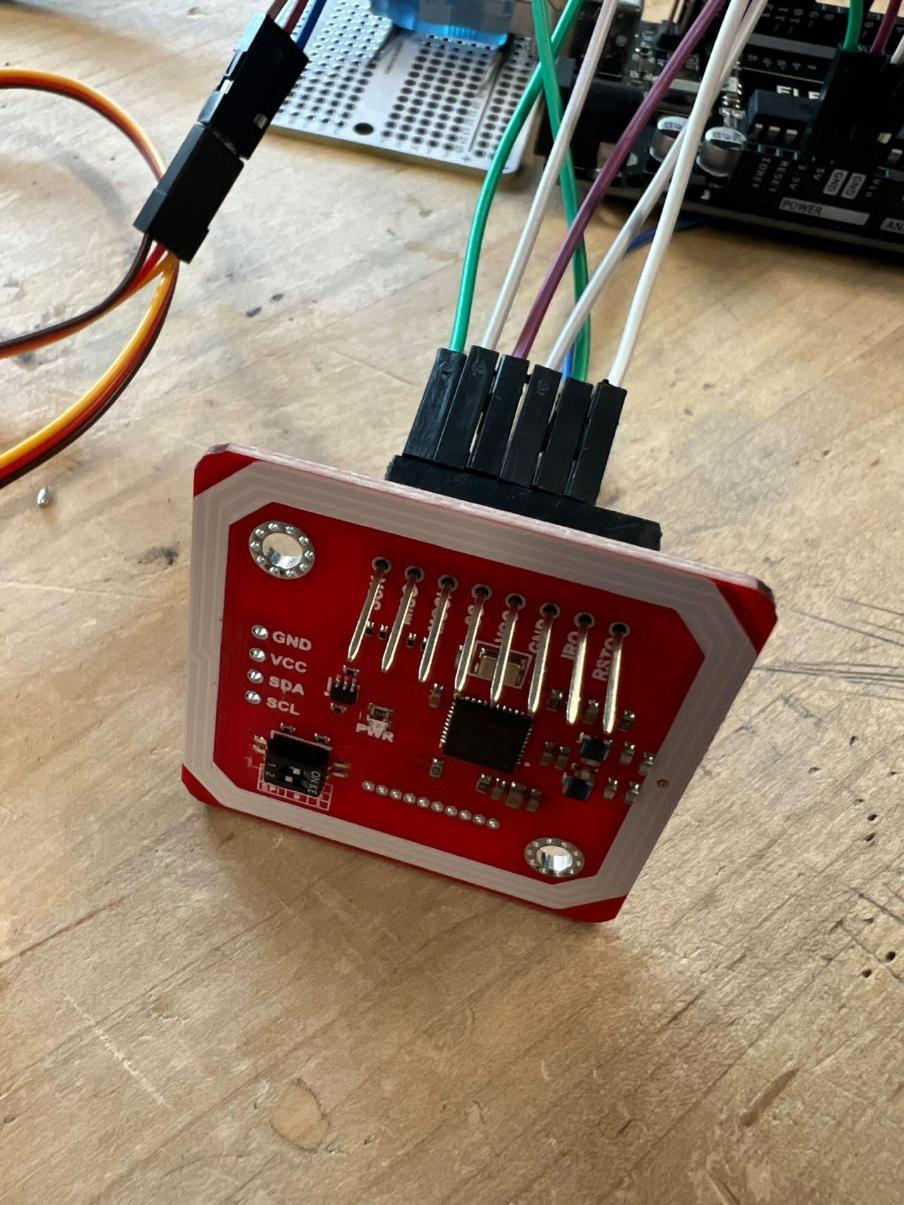
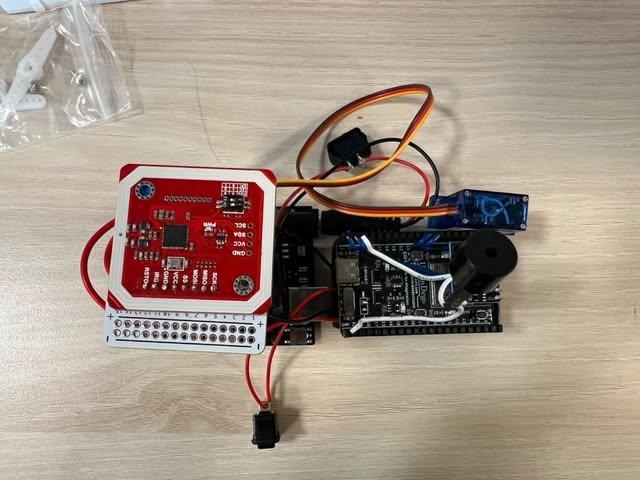
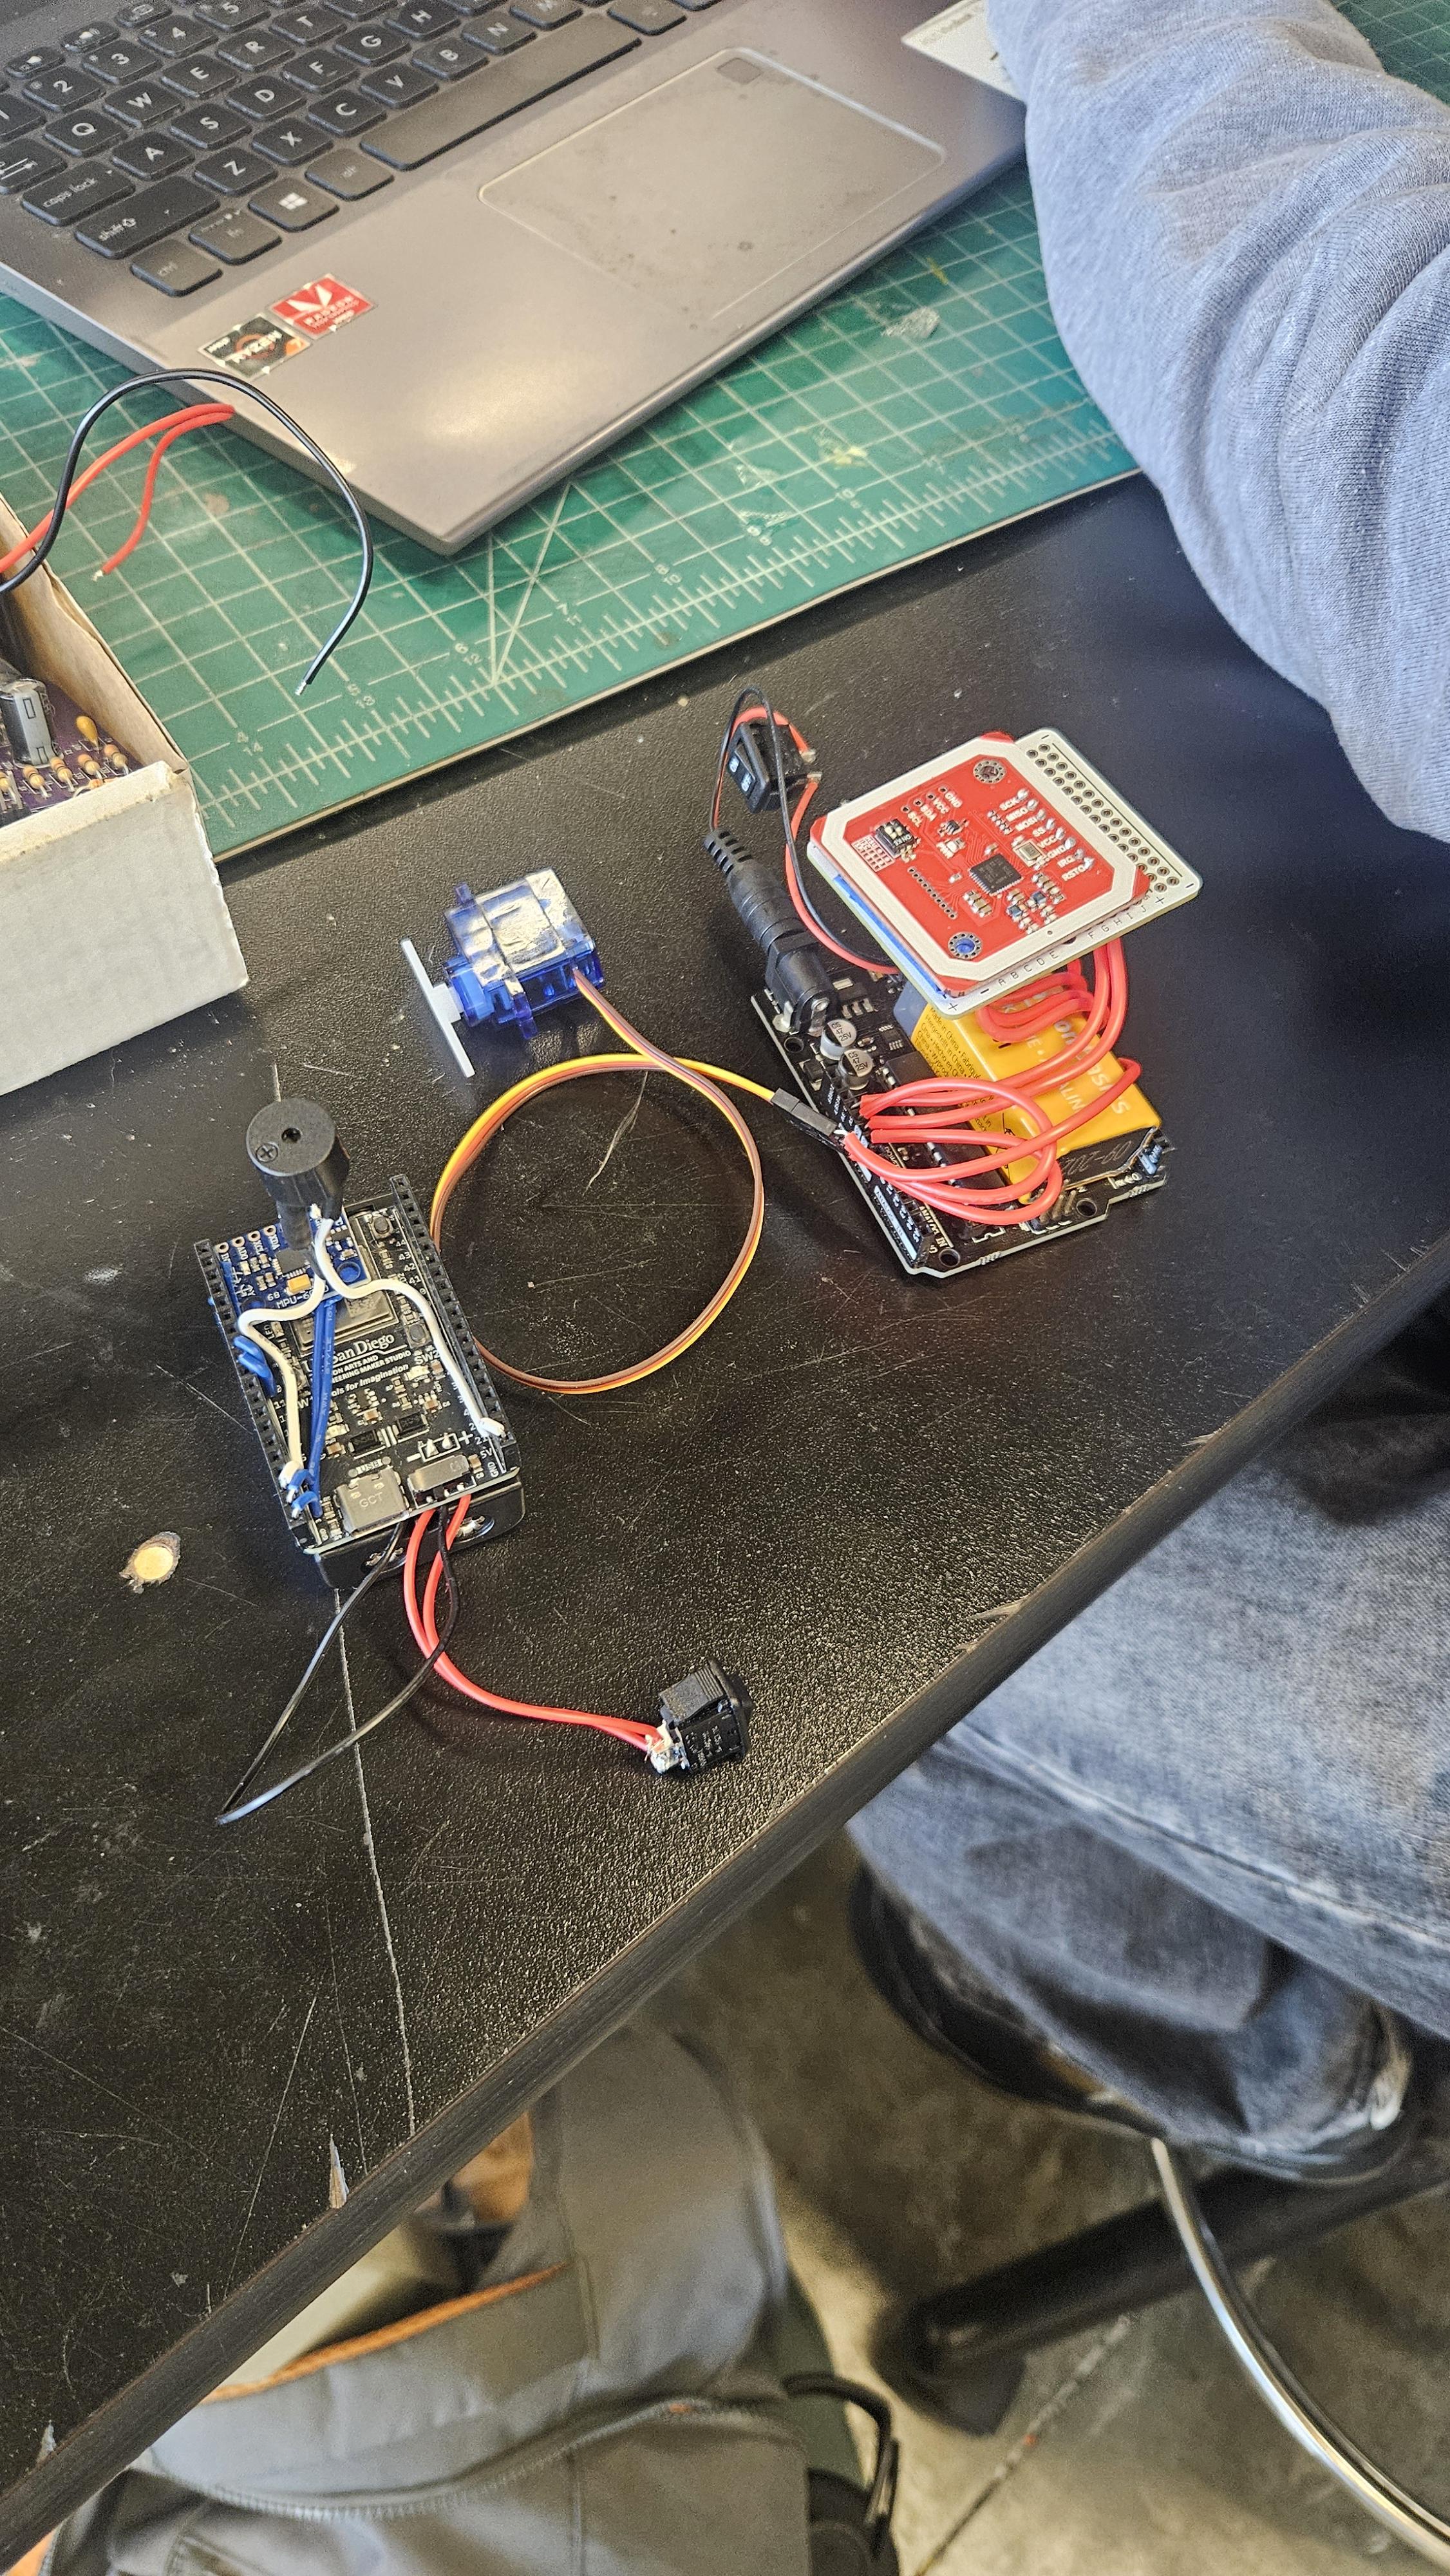
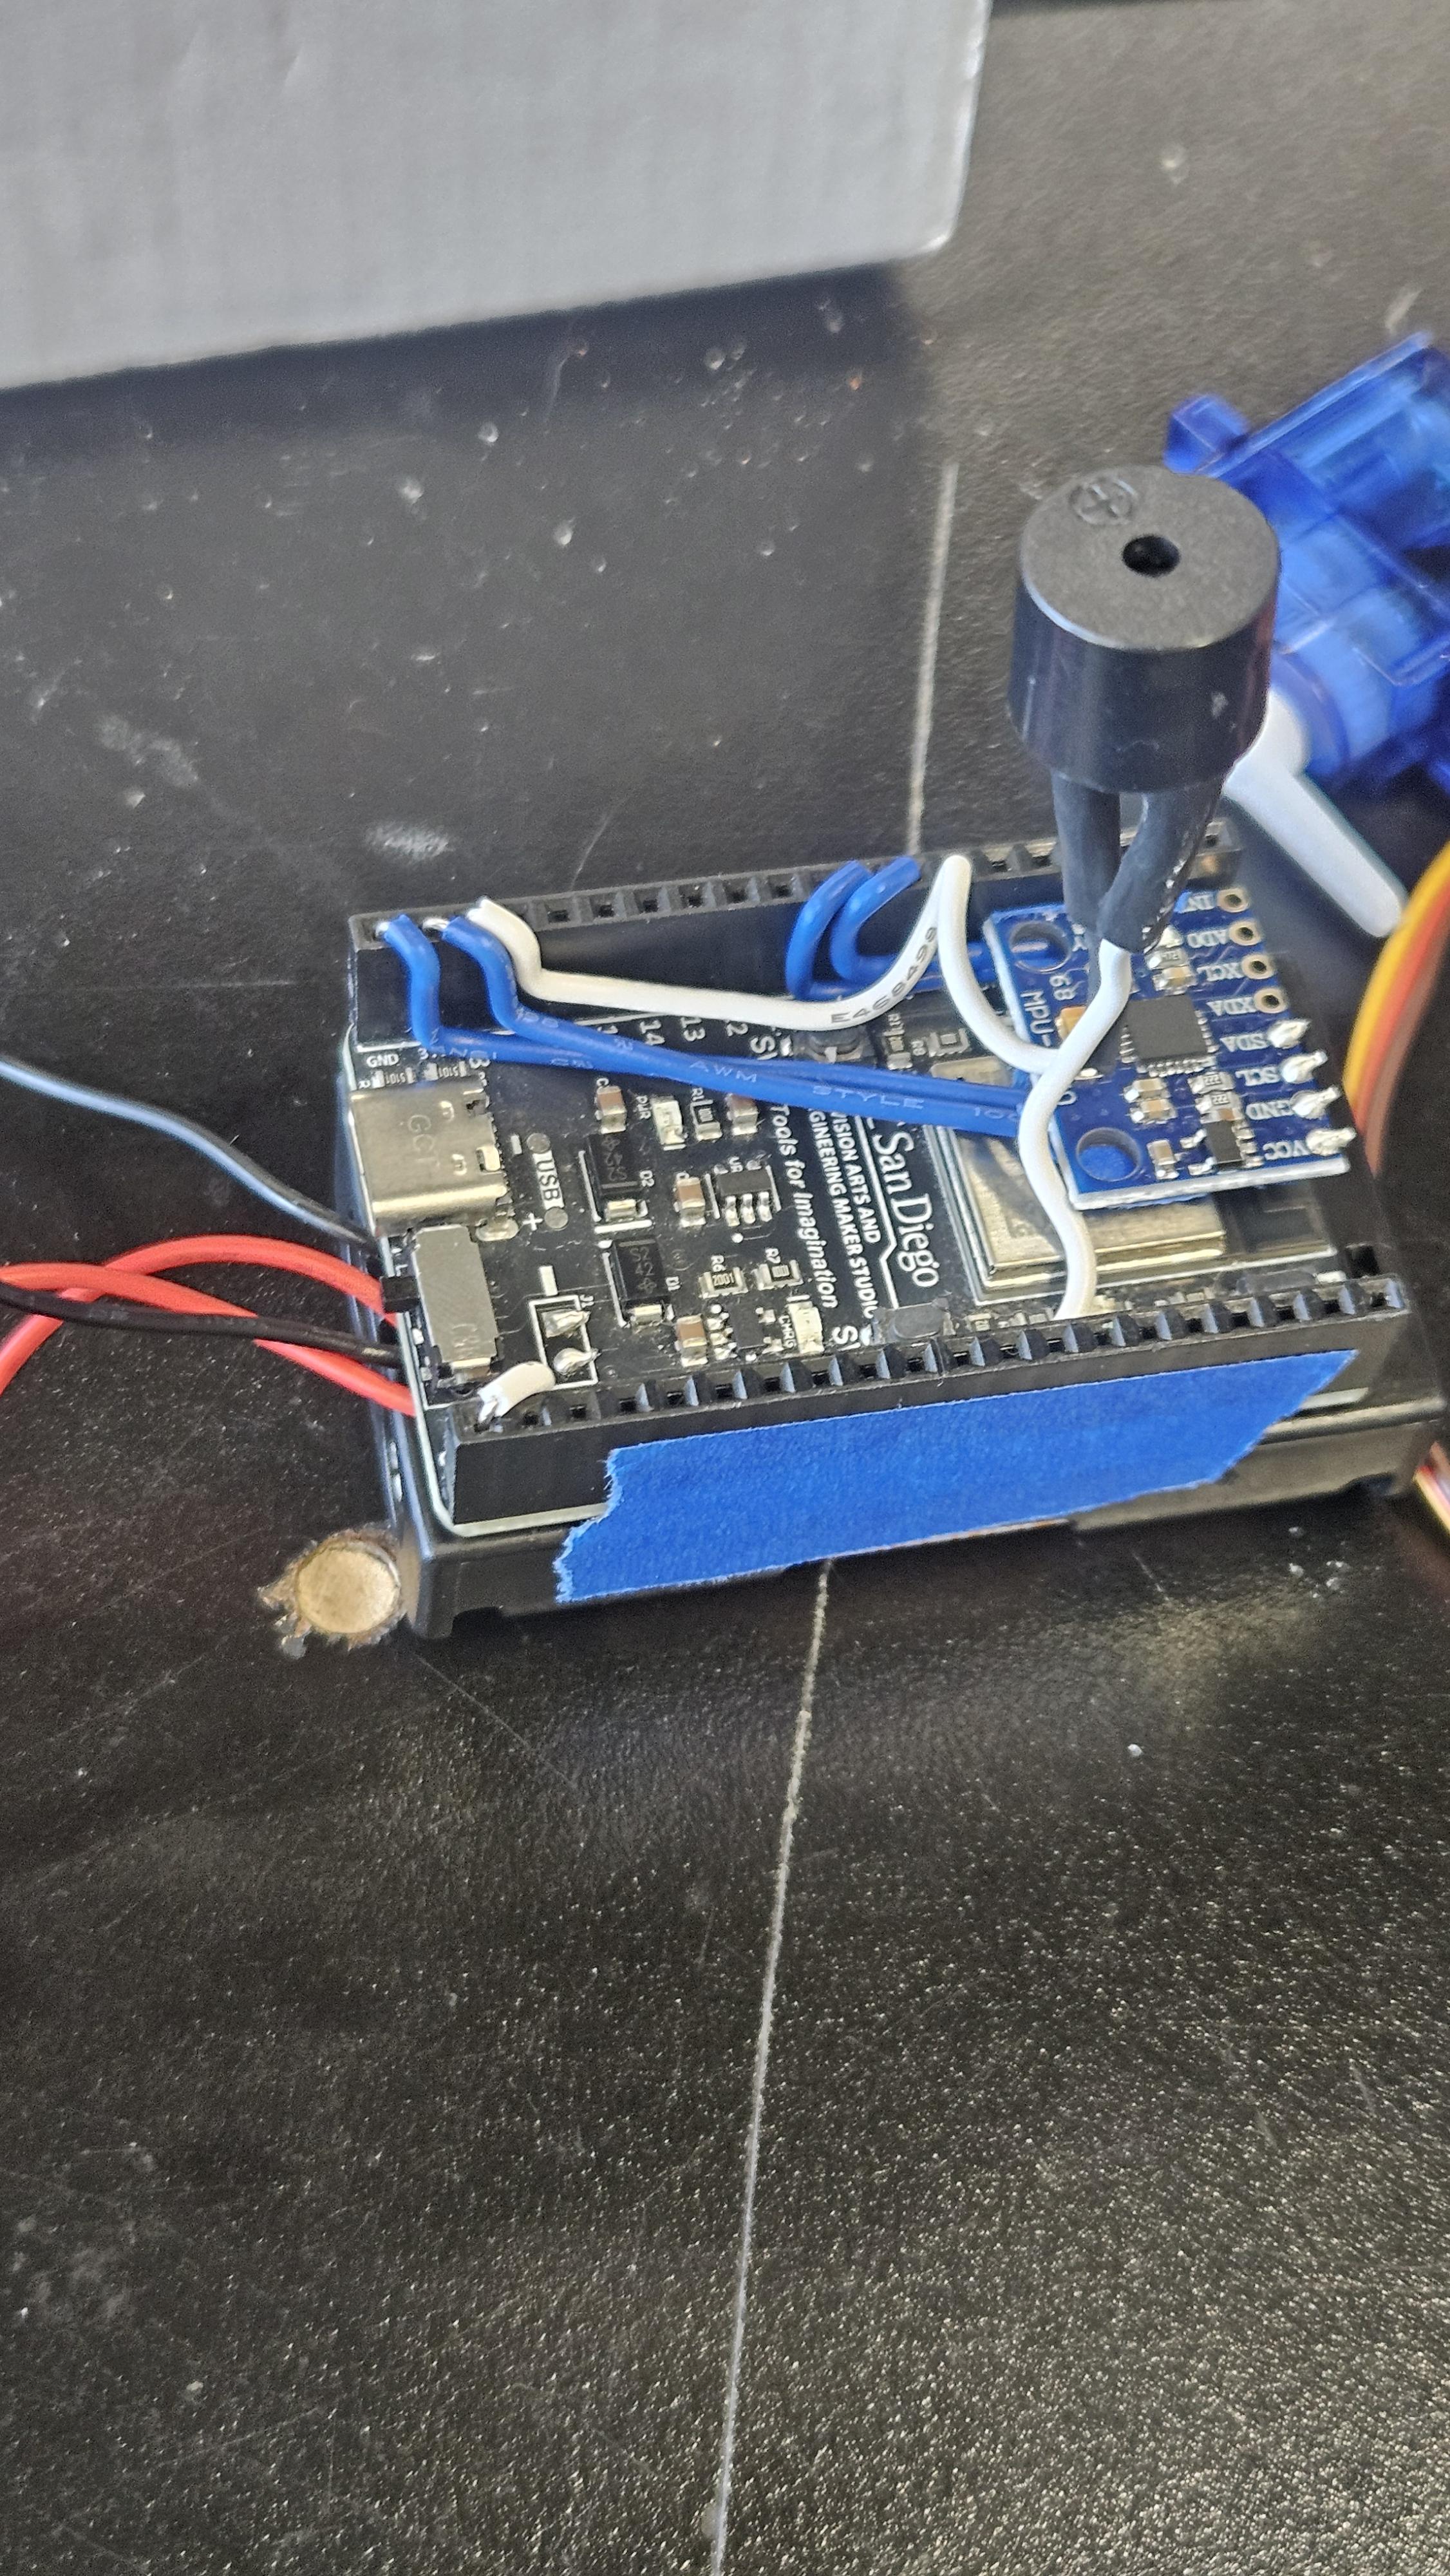
On the hardware side, the build consists of a PN532 NFC RFID module for card scanning, an Arduino Uno R3 to handle the locking mechanism, an ESP32 to run the WiFi dashboard, an MPU-6050 accelerometer for motion detection, a buzzer module for the alarm, a 9g micro servo motor to physically operate the lock, and 9 volt batteries to power the system independently without needing to be plugged in.
End-to-End Flow
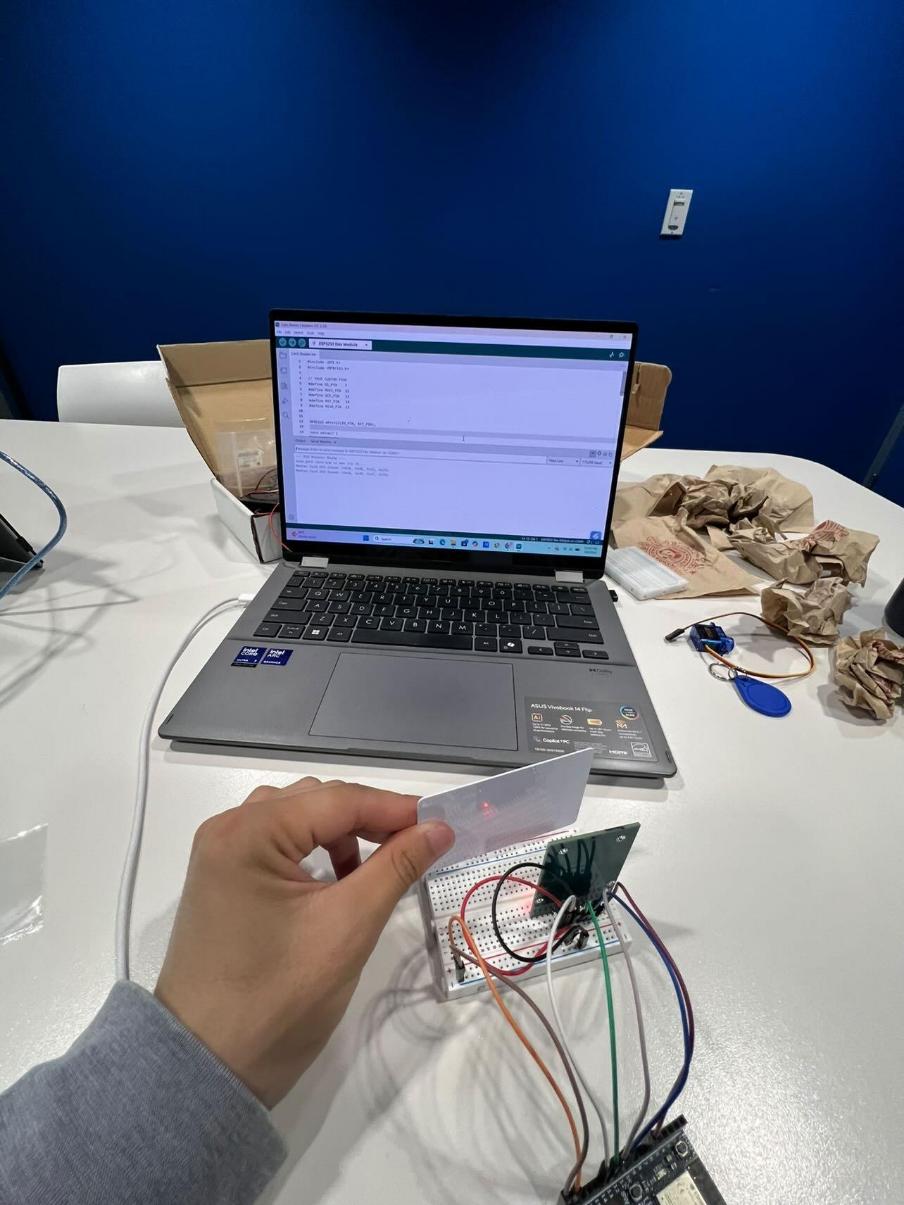
Every RFID card, including any card with a microchip such as our UCSD student IDs, carries a Unique Identifier burned into it that never changes. To assign the lock we first had to find those numbers. We built a simple card reader that scanned each card and printed the UID directly into a serial monitor, giving us the exact values we needed. Once programmed in, the module compares every scan against that stored value. A match rotates the servo and the lock opens. If it does not match, nothing happens. No key, no combination. The only thing that opens this lock is the one card it was assigned to.
For the security side, an MPU-6050 accelerometer continuously monitors the lock for motion. It establishes a reference point, then continuously compares each new reading to the last. Once it detects change in movement, whether from tinkering, shaking, or tampering, it registers the disturbance. If that motion is sustained, the alarm triggers.
At that point the ESP32 takes over. It hosts a complete HTML page directly from the board. When you connect to its WiFi network and open a browser, that page loads instantly and begins polling the device every second, updating your screen with the current motion status, alarm state, and a live event log in real time. You can reset the alarm remotely straight from the page. No internet, no downloads, just a live security dashboard served from a microcontroller the size of your palm.
RFID Modules
Cheap Amazon modules would work for an hour then stop responding entirely. One became unusable after desoldering during enclosure fitting. A PN532 donated by a friend from the ECE tutoring center saved the project. It was reliable and capable of reading cards through plastic. Soldering it in, knowing it was our last sensor, was nerve-wracking.
Motion Sensor
The MPU-6050 kept interpreting changes in orientation as active motion. If the lock was mounted at a different angle than where it calibrated, the alarm would fire even while perfectly still. On top of that, the alarm would continue triggering after resetting it through the browser. Getting the calibration and reset logic right took the most debugging time of anything in this project.
Teamwork
Our teammates were often unresponsive despite our attempts to communicate meeting times. Unfortunately, due to inactivity and lack of communication throughout our team, this project ultimately led to be a two person project. Had our teammates have been more cooperative, we feel that we would've achieved a lot more with our product.
Lock Mechanism
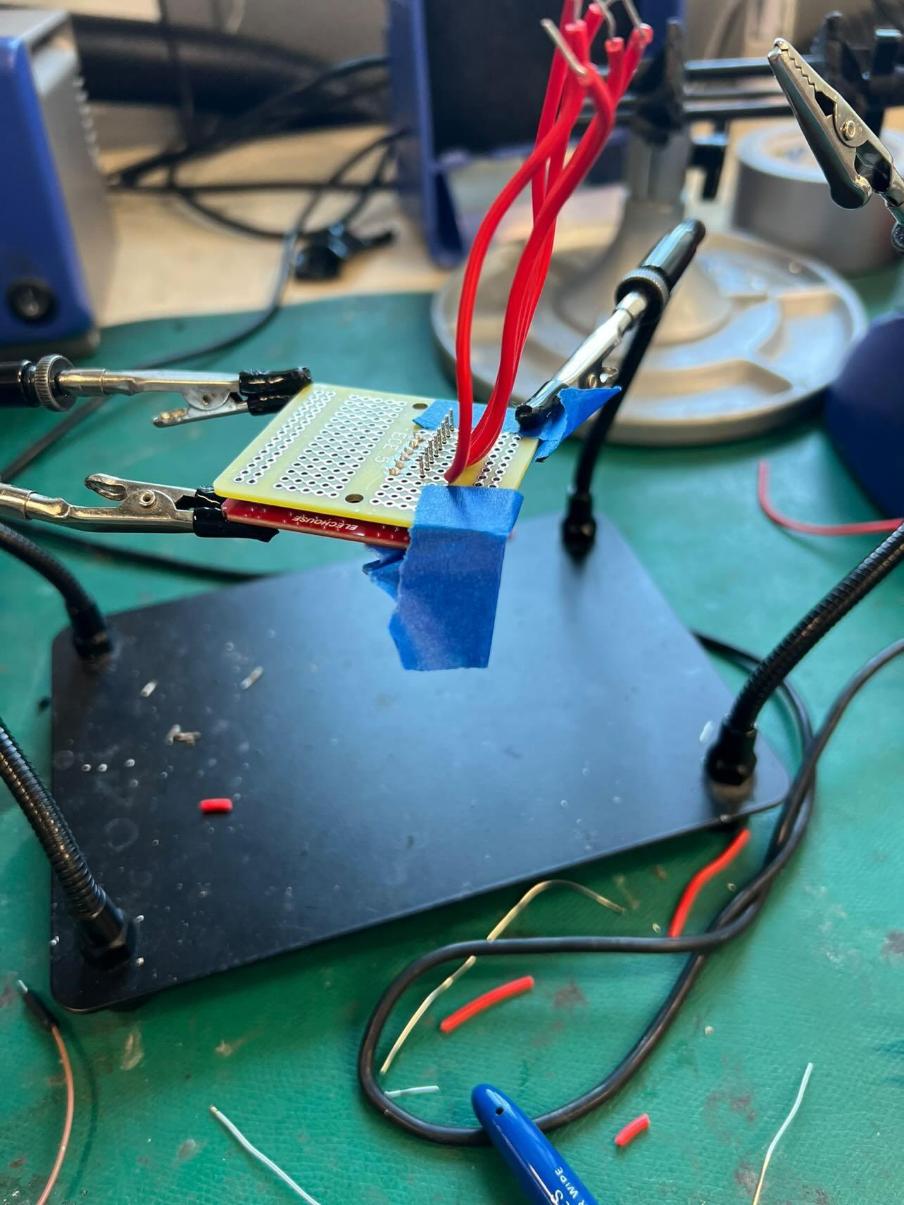
Designing a locking mechanism around a single servo was its own challenge. We had to ensure the lock could not be forced open by manually rotating the rod. A few wires also snapped during prototyping, which we fixed by soldering onto adjacent pins on the same breadboard branch.
Future Updates
Working under a $25 budget meant compromises. Given more time and resources, here is what we would build next.
IEEE · Spring 2026